Monday, July 8, 2013

Flooring and Updating an Old Serving Tray - Mosaic DIY

Hope everyone enjoyed the long 4th of July weekend! We had a nice relaxing weekend spent with family and finished ripping off the floors. We are really excited because this week we will have the floors and granite installed, but we have a lot of work to do before everything shows up.

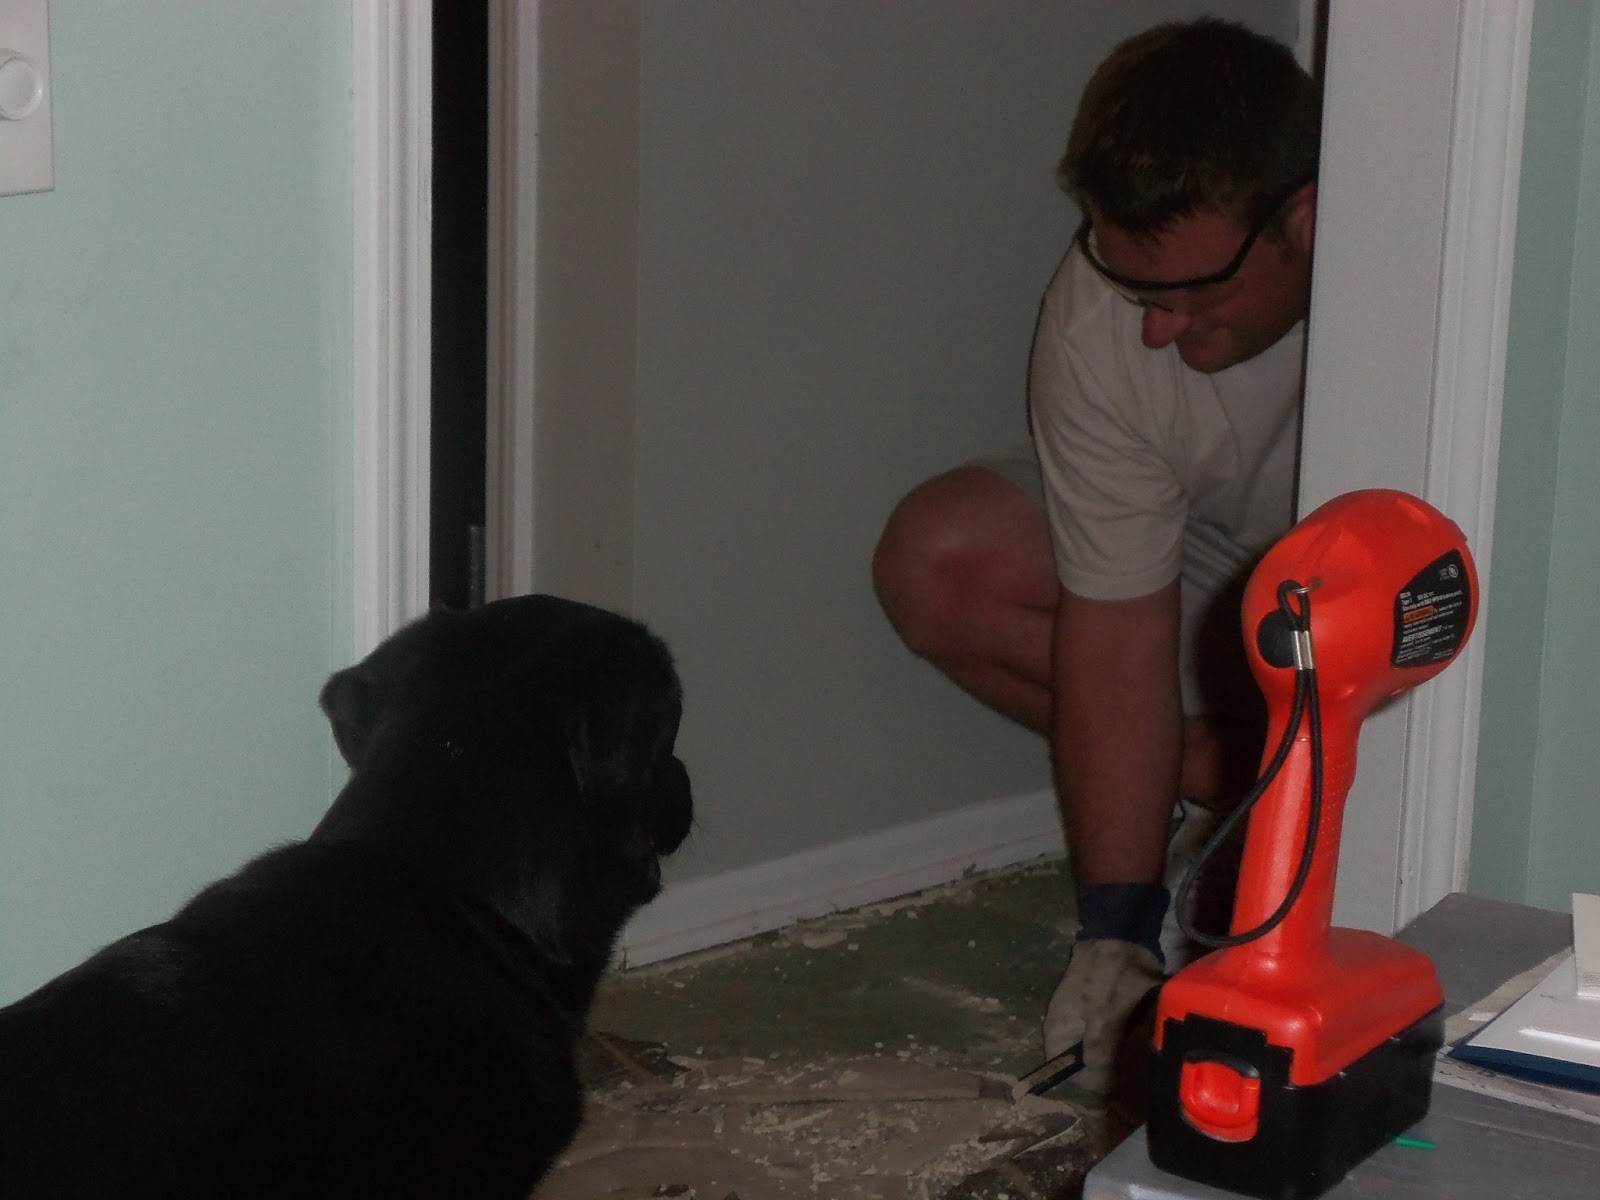
We started tearing up the floor last week and decided to get the rest up before the 4th so we could take off. The entry hall was the most challenging because of the 3 layers, but luckily the hallway was easy so it made up for everything else. Now our house looks even more like a construction zone and Tequila has no idea what's going on...

Tequila "helping" Dad with the floor

Top 2 layers off...blue giraffe layer left

Getting all the carpet up in the hallway

No more blue giraffe
Once the entry way and hallway was finished, we started on the kitchen. The tiles came up super easy and then we had to unscrew the underlayment...way easier than chiseling away the particle board in the entryway.

Old flooring

Getting the tiles up was easy

The even older kitchen flooring...this was a super stylish house :)

The boards came up really easy!

Our main room...it's an obstacle course
After we got all the flooring up we had to go over every inch with a 3' level to check and make sure there weren't any issues. Surprisingly we didn't have many issues with the floors, they were fairly level without many squeaks. We did have a slope in the entry way, but the fabulous Lori Howarter with H&L Properties came over and said that we didn't need to use a leveler and she even helped us fix a squeak by the basement stairs! Now we are finally ready for the flooring to be here :) Then once we leveled and found that the sub-floor in the kitchen was level, we started to finish off some of the parts of the island so we aren't too rushed on Thursday night. I'll do an entire entry for the island later, so we'll post those pictures later.

We decided to take Saturday off and went to several stores looking at pillows and other accessories for the main room. I tend to have really expensive taste, so we did a lot of looking :). I really wanted to stop in Z Gallerie because I love their pillows and I really want their white reptile serving tray for our new coffee table. But since we are making some bigger purchases this week, I decided to skip Z and see if I could find anything at Hobby Lobby that I could work with. After about 15 minutes Brian asked what I was looking for and when I told him he mentioned that we already had a tray that his Granny gave him when he moved to KC. What? I know our house is crazy messy right now, but I would have remembered having a serving tray...but he was right, it was downstairs in our laundry room. It was brown which wouldn't go with much, so we decided to spruce it up a bit. Here is a before and after:


The best part of the update...it only cost $7! Here is a quick tutorial on what we did:

1. Start with an old serving tray. Remove any wrapping around the handles and clean it really good, getting all of the corners.

What we started with
 2. Use a primer+spray paint and spray the tray in a well ventilated area. We chose a super gloss white spray paint for this project. Let dry.

Super gloss white spray paint
 3. Once the spray paint is dry (usually one hour or so) cut pieces of Bondera TileMat Set the length of the tray and peel and stick both sides. You can use mastic if you want, but we had this left over from another project and I love anything peel and stick.

Layer of Bondera Tile SetMat - Doesn't have to be too precise (as you can clearly see)
 4. Then start laying your tiles. We used beach glass because it complemented the color scheme in our room, but any tiles will work. We found the bags at Bed Bath & Beyond for $2 and bought two which was plenty for our size tray.  You can make any patterns that you want, and if you are like me, I changed my mind on the placement about 10x, but luckily they peeled up easy and I could move them around.

Mosaic is great because you don't have to be precise

I finally got the spacing and the colors where I wanted them to be
 5. Next, cover the entire bottom layer with grout. Make sure to smooth out the grout evenly over the tiles and get into all of the cracks. I hate this part because it's super messy so Brian stepped in.

Time for grout
 6. Once the grout is evened out, take a wet sponge and gently wipe the tiles down until they are a nice clean surface. This takes awhile with the sea glass because we had to wipe each piece of glass down one at a time, but it was worth taking the extra time. Once the glass was cleaned, we realized you could really see the tape that we used through the glass, but it tinted the white glass a bit and added an extra element that we like. Next time, we would probably use mastic, but sometimes you use what you have. :)

After the first round of cleaning
 7. Let the grout dry overnight and then add any finishing you like. We wrapped the handles with some rope that we had lying around to give it more of a beachy feel and used hot glue to secure it.

Finishing up the handles
 And that's it...pretty easy! And we did have to touch up the sides with some white paint when we were done because we should have waited a little longer before starting on the tiles...it's that famous patience again :) But not bad for only $7.

This will be perfect on our new coffee table

I will definitely be posting more this week once our floor is in (I'm so excited!!). Until then, I hope you have a wonderful week!

XOXO,

Sara, Brian & Tequila

Monday, July 1, 2013

Pantry Shelves and a Whole Lot of Electrical

Since Brian is busy doing this...


Definitely not as fun as it looks
Tequila and I are trying to stay out of his hair, so I thought I would update everyone on our remodel. Right now we are taking up the old flooring so that we have plenty of time to level it out before our new flooring arrives next week. The entry flooring is the worst in the house because of the large grout lines which are impossible to keep clean with a dog that molts every other week. Of course it wouldn't be fun without some surprises, so once Brian loosened up the tile we found not one, but two layers of flooring. This one is definitely my favorite...

The original flooring
Blue Giraffe tile with yellow grout...what? I bet that looked sweet with the neon blue shag they were rocking all over the house. I don't think I've ever seen anything like this, and other than the color, it's a pretty cool pattern...I think we should cancel the flooring and go with this :) Just kidding!

We have been working on several finishing projects while waiting for the floor to get in. We've touched up paint, done a ton of caulking and are working on finishing the windows. But that's nothing compared to the electrical work we've put in this week. Switching out electrical sockets would be so much easier if the previous owners hadn't tried to cut corners and wired everything wrong, but even worse, we had to go buy all new screws and wiring for all the switches and sockets because we have to attach everything through a layer of drywall and a layer of paneling. Awesome...after a couple sparks, tons of frustration and a lot of guidance from my dad we were able to get the main room all hooked up and working. We even got the new ceiling fan up in the kitchen...

Want to test the strength of your marriage? Try hanging a ceiling fan...
We still have some outlets in the kitchen that need work, but we will get to those one at a time. Notice in the picture above, we did hang a few of the cabinet doors in the kitchen...we are only going to hang the ones that aren't going to be in the way of the granite, but I like the way that they look so far. We of course could have waited until after the granite was in, but that wouldn't be any fun. 

We also decided to tackle the pantry with the hopes that we can start to move some of our kitchen stuff out of the guest room. In the old pantry, the previous owner had tried to put in pull out drawers, but the problem was, they didn't account for the trim surrounding the pantry so the drawers couldn't be pulled out. Then they weren't level and attached securely so it was a balancing act trying to store groceries and the shelves were so low that you couldn't put in most boxes or tall containers. We had so much space, we just needed a better way to use it. So, we wanted to build something that was super secure and that would allow us to store larger items if we needed to, like cereal boxes and pasta containers. Here is what we started with:

Pull out drawers would be great, but the opening isn't wide enough to utilize all the space

We ripped everything out and then painted the inside to lighten it up a bit and to match the rest of the upper cabinets. We used a slightly darker paint color than the walls which compliments and contrasts. Then we measured the height of the pantry so we could determine the area that we were working with.  I had found a post on Pinterest that gave you the space you would need between shelves depending on what you needed. We decided to do the following: 18" for large items at the bottom, 15" for cereal boxes and taller items, 10" for other boxes/bags/etc., 6.5" for canned items and 7.5-8" for miscellaneous at the top. We did the miscellaneous section at the top for breads and English muffins that we can slide underneath the top trim with no problem.

First - measure and nail in
I measured the space between the shelves that we needed, making sure to add on 5/8" to each measurement to account for the width of the shelving we were using. Then I (yes I did this while Brian was at work...surprise!) used a level and a nail gun to attach pieces of leftover 1x2" pieces to set the shelves on.

Then I had to cut out the shelves. We had to buy two large pieces of thick particle board to level off the island so that we can easily lay the granite when its ready, so we had plenty left over to use for shelving. The problem...while Brian was at work, all the power tools ran out of battery so I had to use a hand saw to cut out 3 of the shelves. This was one of the worst ideas because my arms were stiff for days...I did wait for Brian to get home to cut the last shelf because I couldn't carry the larger piece of particle board by myself...it only took him 5 minutes with the power tools, but he was impressed with what I got done while he was out.

With the shelves (finally!)
Next we added a layer of cork liner to all of the shelves to keep water from hitting the particle board. Note for those wanting to use cork liner...spend the extra money on the cork liner with adhesive already on it. We made the mistake of buying the cork without adhesive and decided to try out Gorilla Glue - worst idea ever. Since the cork was rolled we had to put heavy items on top to even it out and when we went to remove the items, the cork ripped up with it. We spent more time adding the cork than the leveling and cutting the shelves, so cork liner with adhesive is totally the way to go. Once we got all the cork in, we nailed in some trim pieces to finish off the shelves. 

Nailing in the trim
I do have to admit that I wasn't too excited with the shelves because they weren't perfectly even, but they are going to be so much more practical then they were before. The last thing we did was to paint the trim and we were done:

Yay! Steady, sturdy and functional shelves :)
The whole weekend wasn't all about working on the house...we did enjoy the beautiful weather and played around with Tequila. Here are some of our "break" pictures:

Beautiful sunset in our backyard
Our little painter with his painter's shirt on


I think the paint fumes were getting to us :)
 We have more projects in progress, but the electrical took up the majority of our week, so we will post more when we get them finished. Let's check back in to see how far Brian's gotten with the flooring...

Awesome...2 layers down, 1 more to go
Hope everyone enjoys the short holiday week!

XOXO,

Sara, Brian & Tequila

Sunday, June 23, 2013

A Little Detail Goes a Long Way

Hope everyone is enjoying the first weekend of summer! With the temps climbing outside, we have taken most of our projects inside this week to allow for a more consistent climate for painting. We are finally able to start working on some of the smaller detail work that we feel makes the biggest difference.

After painting the walls and the ceiling in the main room, we weren't too happy with the way the walls met the ceiling. With all the drywall work that we did, we wanted a more polished and finished look. So we decided to try our hand at crown moulding. We did a lot of research online and found a piece of moulding we had bought for the sun room to try to make some transition pieces for the corners. Since we have vaulted ceilings we thought it would be a little more difficult to make the cuts, but after some trial and error we were able to get them up.

Before the paint

After the second coat of paint - so much better than railroad ties
The moulding really finishes off the ceiling in this room and makes it look more polished. After several attempts at transition pieces, we ended up cutting the pieces to fit as close as possible and then used caulk to fill in the gaps. We are pretty pleased with the turnout and we will be touching up the wall paint in the next couple of days to complete the look.

One of us wasn't too thrilled with putting up the moulding...

Tequila hates the nail gun

Really hates the nail gun
But still loves Dad

We finished the final coat of paint on all of the trim and the kitchen so we've checked that off the list, then we put up our new light fixture...

A lot bigger and more modern
Now that the light fixture and the crown moulding are up, we are at a bit of a slow period until some of our big purchases come in. We ordered the flooring that is being shipped from California and just saw our granite slabs that arrived in the warehouse (so excited!) this week. We've got to wait until the floor is laid down before we can set our island and finish it, then we'll get the granite laid and then the backsplash put up. But don't worry, that didn't stop Sara for creating new projects for us to work on.

Remember the Rustic X Console Table we built?

We moved it inside to see how it looks...and to see how the lamps would look :)
Well, of course we needed to add a coffee table to match! Luckily there were already plans for a Rustic X Coffee Table by the amazing Ana White!

Here's what we started with

 We set up the frame and then Sara's parents stopped by to check it out and got roped into helping.

Tequila seems to like it
It's such a solid piece and it's super heavy so I am glad we built it inside, because I am not sure the two of us would have been able to get it inside. Once it was built and the X's were fit in, we moved it to the kitchen to start staining.

X's on and sanded

 Since we will be replacing the floor we didn't throw down tarps, but staining is really messy so we would highly recommend it otherwise. Here's what the table top looked like after the first round of stain:

I love how the wood grain pulls the stain
 We wanted a little weathered look for the coffee table similar to what we did with the console table, so we lightened it up with a homemade white wash, did a light sanding and added some sparkle with a nickel finish spray paint. I would recommend testing out a few things to get the color that you like, but we are really happy with the results. Then we finished it up with two coats of a semi-gloss polyurethane to seal the piece and let it dry.

Letting the poly dry
I can't wait to fit this in the room with the console table and the couches. We haven't had a coffee table in our house before, but we are looking forward to having one now!

The coffee table wasn't our only project this weekend, but it's the only one that is finished to share. Here's a teaser for what's to come:

Our tools for the new project...any guesses? Stay tuned to find out!

We'll have more updates soon!

XOXO,

Sara, Brian & Tequila

Oh...quick brag, check out how awesome the doors look on the bar piece:
Glad we cut out windows for the cabinet doors!


Monday, June 17, 2013

Cocktails & Dreams

Hope everyone enjoyed Father's Day weekend! We took Sara's Dad to Granite City for brunch on Sunday morning...if you haven't been to their brunch before, you need to go...it's excellent. Wish we could have also shared the day with Brian's Dad, but we will have to postpone our celebration until July. We are both so fortunate to have amazing Dad's in our lives that have always been there for us and who continue to teach us about life and love each day. Plus, they are the ones that introduced us to home improvement and diy, so we wouldn't be anywhere today without them. Love you both!

This week was pretty busy for both of us, but we still got a lot done on our kitchen/main room remodel. It's starting to come together and we will be sharing those details later this week.

One of our favorite projects that we started this week is our bar area. Remember when it looked like this?

Our bar nook
Yeah, we weren't sure those bowed faux-wood shelves were going to hold up much longer, so they were the first to go. Oh, and don't forget about that hot neon-blue shag...

Don't worry...that's staying :) We need a little character in there :)

We had thought about replacing the faux-wood shelving with glass shelves, but we weren't sold on the idea yet so we left the space alone while we continued to demo, drywall and paint. Then on a whim, we stopped by the Habit for Humanity ReStore and found what we didn't even know what we were looking for...

This was too good to pass up

Now, of course we measured the space before we went to the store...I mean it was a couple days prior and we didn't write any of the measurements down, but Brian convinced me that it would work. And he was spot on...check out this handsome handyman gloating over his brilliant mind:

Couldn't have cut it better than this

So the first thing that we did was con Sara's dad and brother to come over to screw it into the wall. Thanks to Tequila and Callie, it took twice as long to put up because they were running around like idiots knocking everything over (surprise, surprise). But we got it hung...

Good news...it didn't fall!
Once it was leveled and hung, we stood back and noticed how uneven our ceiling looked. It almost made the entire cabinet look like it was tilting, but Brian was convinced he could fix that. Either way, it is a major improvement from the bowed shelving!

So, being the patient wife, I waited an entire hour before I got right to work priming the cabinet. Not satisfied settling with just painting the back of the cabinet to match (and ok, I ran out of primer), I decided to look for alternatives ways to update the cabinet. And I did the one thing I swore I would never do...I decided to put up wallpaper. After some research and sticker shock with some of the prices I saw online for wallpaper, we decided to hit up Lowe's and found a pattern that we really liked. It was about $21 a roll, so it wasn't too much to spend in case it turned out to be a disaster. There weren't too many left at the store and when I reached in to pick up a roll, there was one inside that had been opened already...we took it to the front and they let us walk out with the opened roll for $8.50! Score! Especially since Brian wasn't sold on the wallpaper idea...he remembers very clearly his dad putting up wallpaper in his little sister's room when they were growing up and remembered vowing to never attempt it due to all the mess.

But I am so happy that we decided to try it! All we had to do was add some water...after a few trial & errors, we got it up and I am so impressed with Brian's measuring, cutting and alignment skills.

The color changes with the light and it has just enough sheen to make it interesting...not a bad $8.50 investment!
Then, since we have already sharpened our carpentry skills with the bar stools and console table we decided to build a custom wine rack to fit below the cabinet. This replaces the one we had in mind to go in between the studs of our kitchen and mainroom but didn't have enough space for. Sometimes compromise works out in our favor...

Fully stocked and ready to go

We also painted the back piece of drywall black to add a little contrast with the wine rack and as a background for the some of our finishing pieces (that will come later). Then, to finish the piece we added some trim and pieced in some scrap wood to add a base at the top corner of the cabinet to help lay in some caulk.

I love trim!
After lots of caulk, 2 coats of primer and Impervo, here is the end result:

After the last coat of paint - and my husband did an amazing job caulking the top to fill in the gaps!
What do you think? Not too shabby :). And the best part, we spent less that $60 on everything including the cabinet piece, wallpaper and the wood to make the custom wine rack! It was a lot of work, but I think it is one of my favorite areas of the house now. We also cut windows in the doors and will add those and the shelves once the paint cures, so we will add more pictures once we get those up. Granite will come next and then we will be able to finish it up with a backsplash, so stay tuned to see the final after. For now, we are enjoying our progress:

A little work goes a long way

We'll have more updates this week on our progress, but for now we will leave you with an Awkward Schorr Family photo...

Tequila doesn't really enjoy these moments as much as we do :)
Hope you enjoy the rest of your Monday!

XOXO,

Sara, Brian & Tequila