It's snowing again! Luckily we were able to get the rest of the outside work (cutting, moving, etc.) done so that we could move everything else inside. I mentioned Brian was working on the crown moulding in my last post and it's all finished and looks awesome! Check it out.
 |
| Crown moulding is up! |
 |
| Another view |
It really cleans up the room and Brian is definitely a crown moulding expert by now :)
 |
| View from the bed, still messy but we are a work in progress |
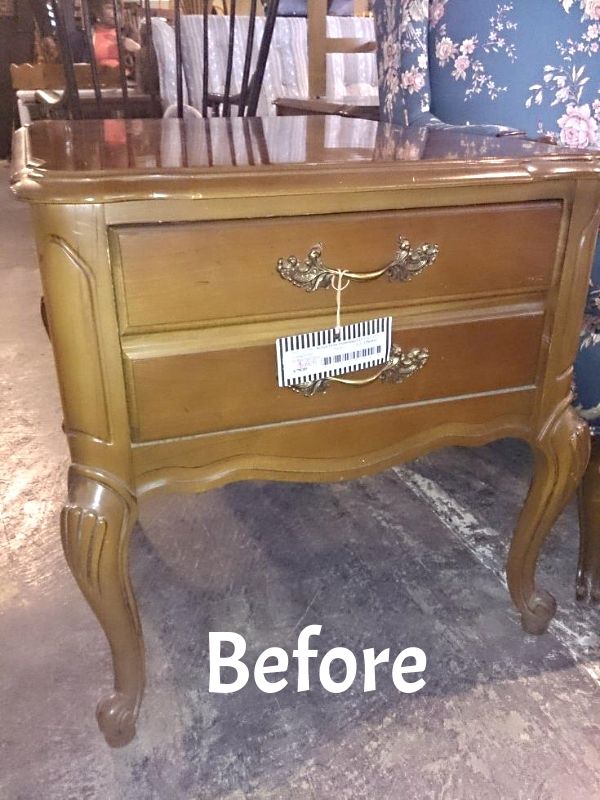
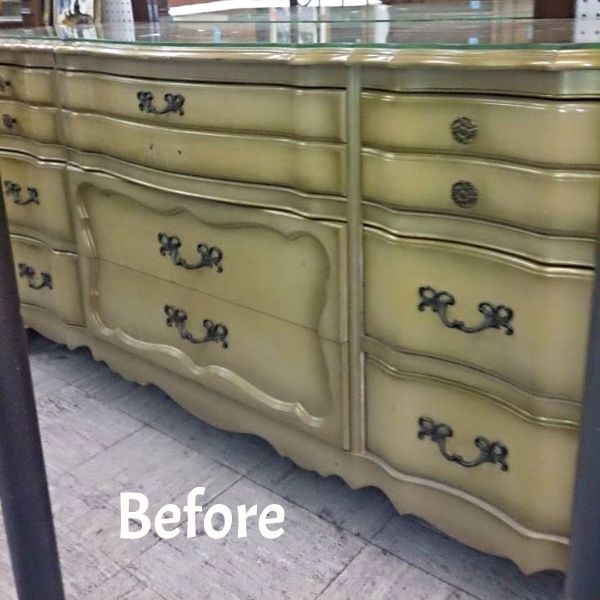
Now that the crown moulding is up, we decided to move in the completed furniture. Here is a quick look at what we started with:
 |
| End tables |
 |
| Dresser |
Here's what a few coats of primer, a couple of coats of really good paint and a quick coat of spray paint can do:
 |
| New bedside tables |
 |
| Our new dresser |
I love how they both have come together and look like they are a part of a set. We used a new type of paint, Benjamin Moore ADVANCE Alkyd Paint. It has the application and performance of an oil paint, but it is a waterborne formula that cleans with soap and water. I was definitely a little skeptical at first, but the guy at Zeke's convinced us and I am so glad that he did! It hardened really nicely and the best part, it was a lot less toxic than the Impervo. It also dried a lot faster and you don't need to put any poly or wax on the furniture. The poly would actually harm it, so you get to skip a step! And the best part, it was about 1/2 the cost. I would definitely recommend this to anyone painting furniture that wants a clean and lasting finish. We also used it on the trim and you can't tell any difference between the Impervo trim and the ADVANCE.
But we didn't stop there. When we were in the West Bottoms we found a hutch that someone had painted and I completely fell in love with it. The shape of it and the overall look of the piece was what I didn't even realize I was looking for. The problem, it was over $800 and it had already been painted with distressed chalk paint. I really did not want to spend all that money to repaint it the way I wanted it done. So we decided to try and find something that we could transform ourselves.
That proved to be a little more challenging than we were hoping. All of the hutches we found were meant specifically for dining rooms, so they lacked a lot of drawer space. Since this was going in the bedroom, storage was key for us, so we started looking into dresser bottoms with separate hutch tops. When we found the perfect dresser, we knew we would need to find something with more shape than just a typical hutch top. We asked consignment stores if they ever had any hutch tops that came in and everyone we spoke with said that they typically toss them, if they aren't already a part of the piece. We knew it might be a little difficult to find what we were wanting, so we turned to Craigslist. The good news, there were a lot of hutches for sale...the bad news, most of the hutches were one piece, or if they were a 2-piece set, the top wasn't large enough or detailed enough for what we wanted. Just as I was getting a little discouraged (and let's face it, I am not very patient) we found it...a 2-piece, enormous hutch that was a little scuffed but beautiful. I knew we had to go look at it.
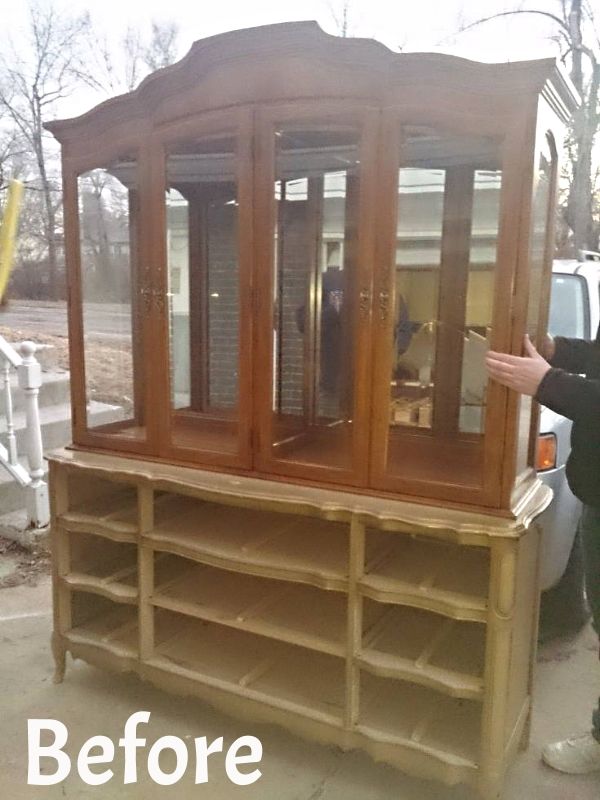
We sent an email and the next morning we got a call from the owner and they said we could come take a look at it down in the West Bottoms. It was huge! But it was exactly what we were looking for. After measuring we thought that it would be able to work with the dresser that we were picking up the next day. We should have written down the dimensions, but that would have been easy. Then we had to work on convincing the owner to just sell us the top. They didn't want to part with it, but after almost walking away and then telling them we were going to just fix up the bottom to sell it, they caved and we scored and got the top for $200. It was a little more than we wanted to spend, but it was in excellent condition and it was originally $800 on consignment ($1,500 retail).
Then we had to get it home...luckily my dad has a big truck and Brian is really effective at moving, but he can tell you it was not easy.
 |
| It barely fit in the truck |
Thank goodness my brother lives only a couple miles away and was willing to come over to try and get it out of the truck.Then came the moment of truth...would it fit on top of the dresser?
 |
| Nailed it! |
It fit perfectly and left a little room along the front! The other thing we forgot to check was the height...would it even fit in our room? Time to bust out the tape measure
 |
| Not the most accurate form of measurement...but it looks like it might work |
 |
| Here's a view of the hutch top...it's huge with a ton of glass and mirrors. |
If finished, it would be the biggest piece of furniture we have worked on, but worth the challenge. We decided to forgo taping all the windows in lieu of using a razor blade at the end, it saved a lot of time so I would definitely recommend it. It was definitely a challenge because with all of the mirrors and glass, you have to make sure to cover every inch of it. We used 2 coats of primer and 2 coats of the ADVANCE to cover it. Then we had to move it in...with the help of my brother and a few attempts to get the piece through the door, we got it in and...
 |
| It fit! |
Holy cow it's a monster, but I love it! Plus we got it in yesterday before it started snowing so we could work on cleaning it up in the warm comfort of our bedroom. Here it is after Brian cleaned off all the paint and polished the mirrors:
 |
| Bam! |
I love it! The piece looks like it was meant to be together and it doesn't take over the room...it's just perfect. Oh, and it has lights! We officially have 6x the lighting that we used to have in our room :) The next step was adding in the shelving. We were fortunate that the shelving was thick glass so we didn't have to paint it at all, I almost forgot what the shelving looked like.
 |
| With the glass shelves |
The last thing we needed to add were the doors.
 |
| With the doors |
 |
| Another angle |
Oh my goodness, I love it, it came together so well and it really is a statement piece in our room. Everything fits in our room well and the room feels so more open than it did. We have some closet doors to finish and we'll be adding the finishing touches, but I am so happy with everything. Here are a couple of before and after shots (mouse-over for the after view):

The Dresser:

The completed piece:

We'll have more to show later this week, but are pretty excited that we are getting closer to being finished. Hope everyone stays safe and warm in this weather!
XOXO,
Sara, Brian & Tequila


I really can't say enough wonderful things about this project you did... just absolutely gorgeous! Thank you for sharing!
ReplyDelete